A covered patio is a roof, and it has to be built like one: concrete footings, posts on standoff bases, a beam sized to the span, rafters tied down with metal connectors, sheathing, underlayment, shingles, and flashing where the new roof meets the house wall.
That is the difference between a framed patio cover and the low aluminum awnings bolted to the back of many Houston houses. An awning hangs off the fascia or the brick, it drums in the rain, it traps heat under a sheet of thin metal, and its fasteners land in trim and veneer rather than in framing, which is the weak point when the wind picks up. On the job shown here the awning came down first, the wall and fascia behind it were checked and repaired where the old fasteners had opened them up, and the new structure started again from footings in the ground.
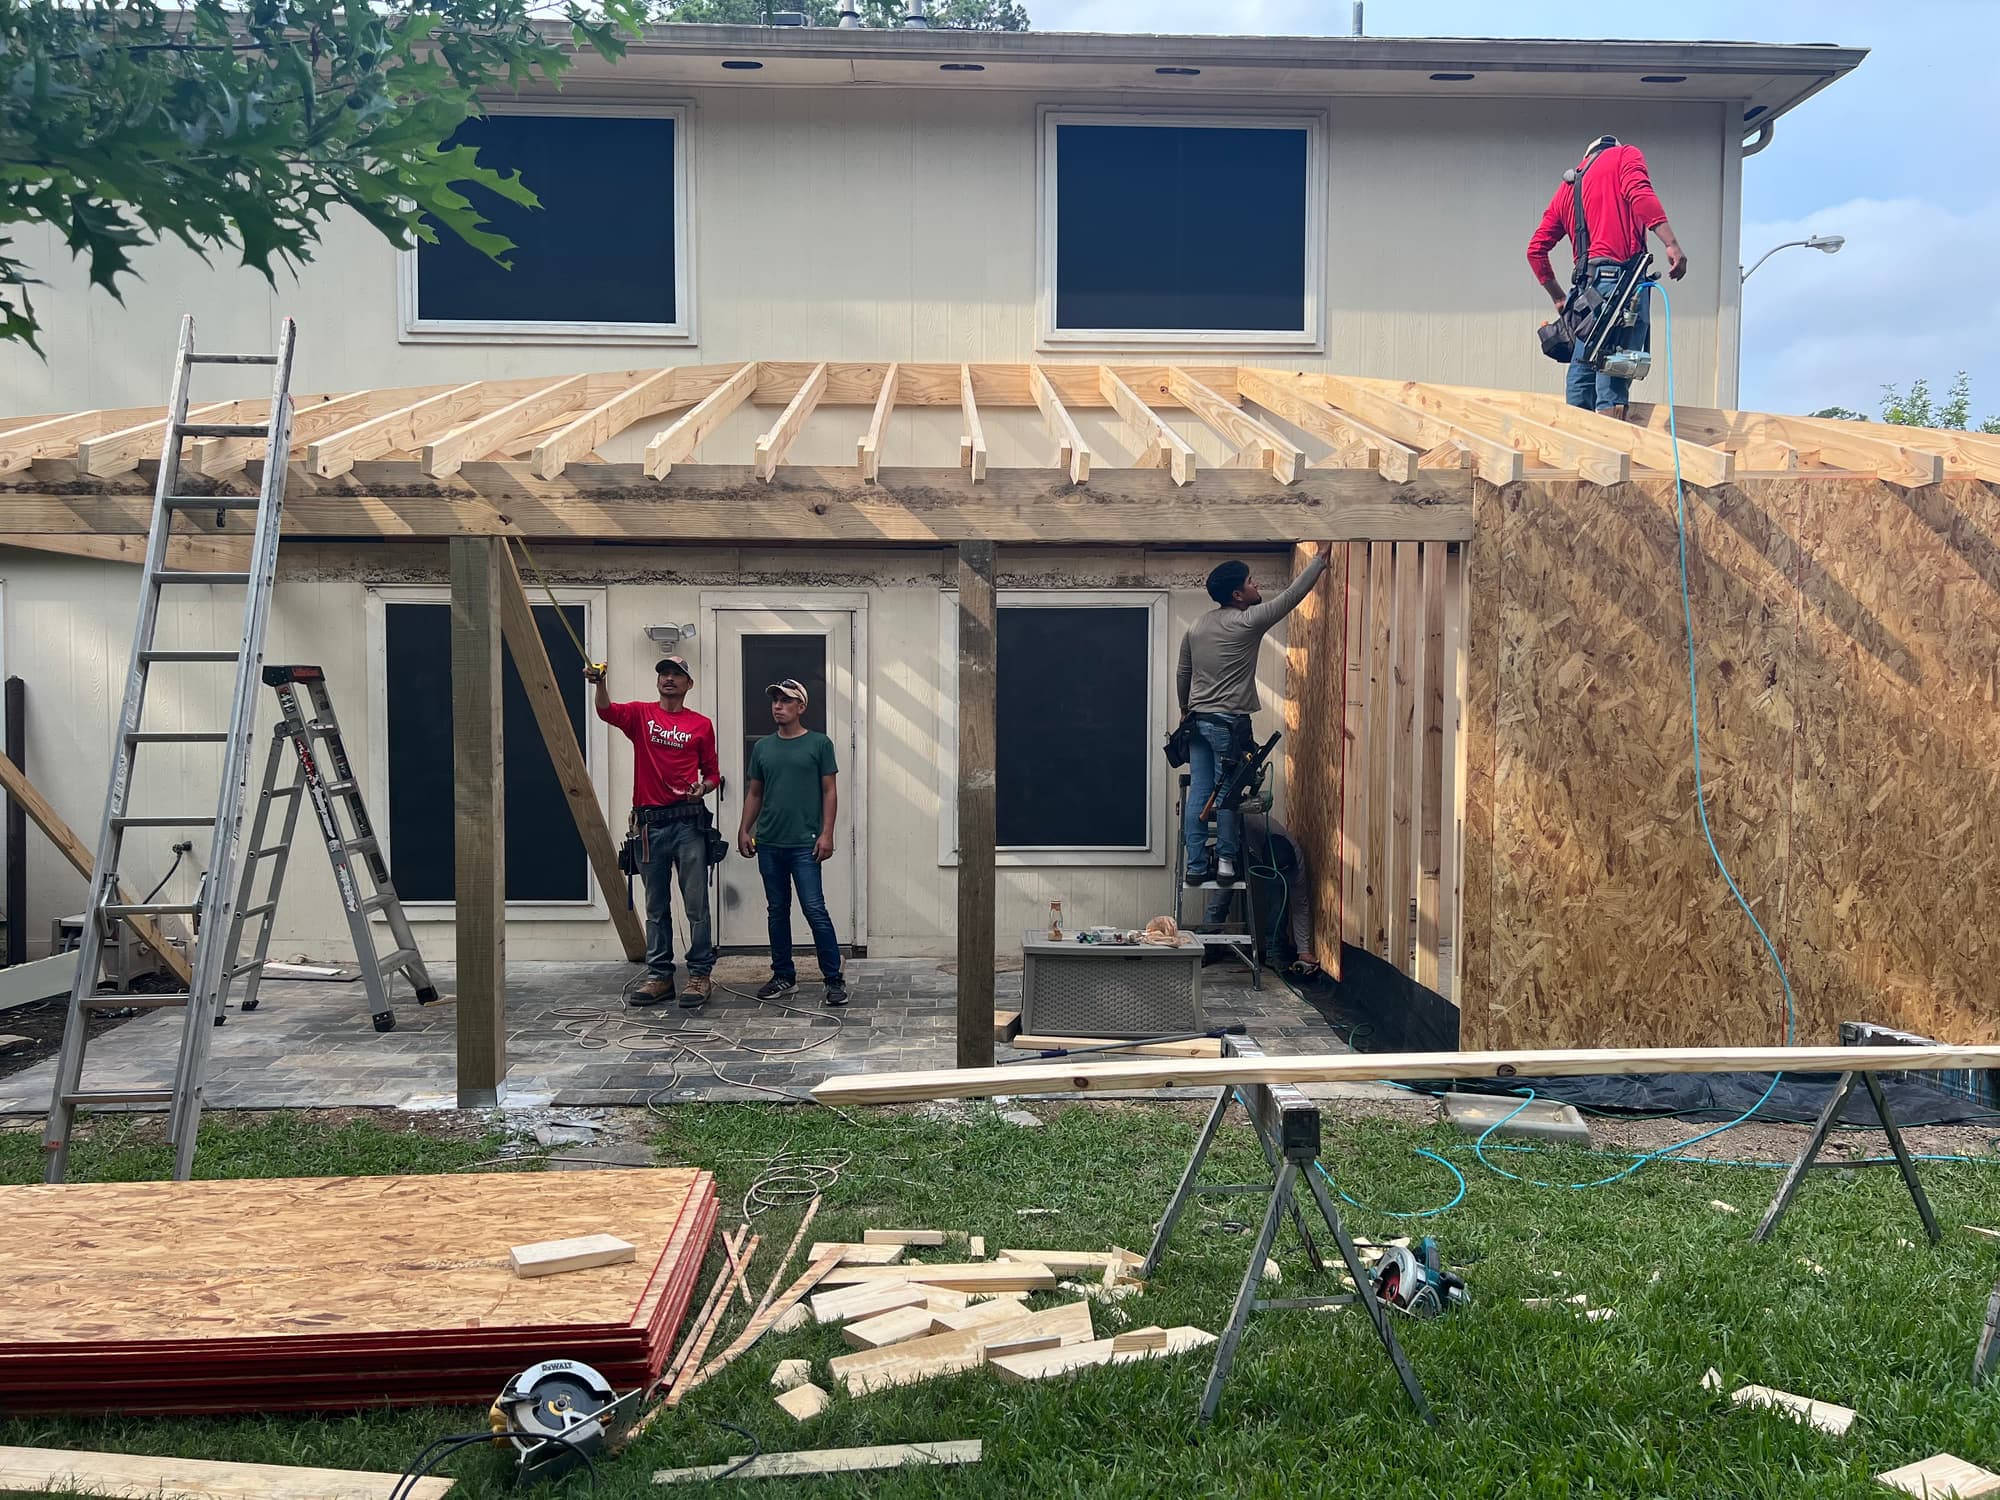
Rafters and sheathing going up on a new patio cover. Every rafter gets a metal tie to the beam, the beam ties to the posts, and the posts anchor to concrete below grade. Every rafter gets a metal tie to the beam, the beam ties to the posts, and the posts anchor to concrete below grade.
Not every patio needs a roof. We also pour open patio slabs, lay and reset paver patios, and rebuild patios where the surface is sound but the cover is not. Where the existing paver field is sound it can stay in place, with the new posts carried on their own footings rather than on the pavers. When a patio turns into a larger indoor-outdoor change, it usually pulls in other work: widening the rear opening for a slider is wall removal and open-concept framing, column wraps, fascia and exterior casing are trim carpentry, and on a whole-home remodel the patio is often scheduled alongside the interior so the messy exterior work happens once.
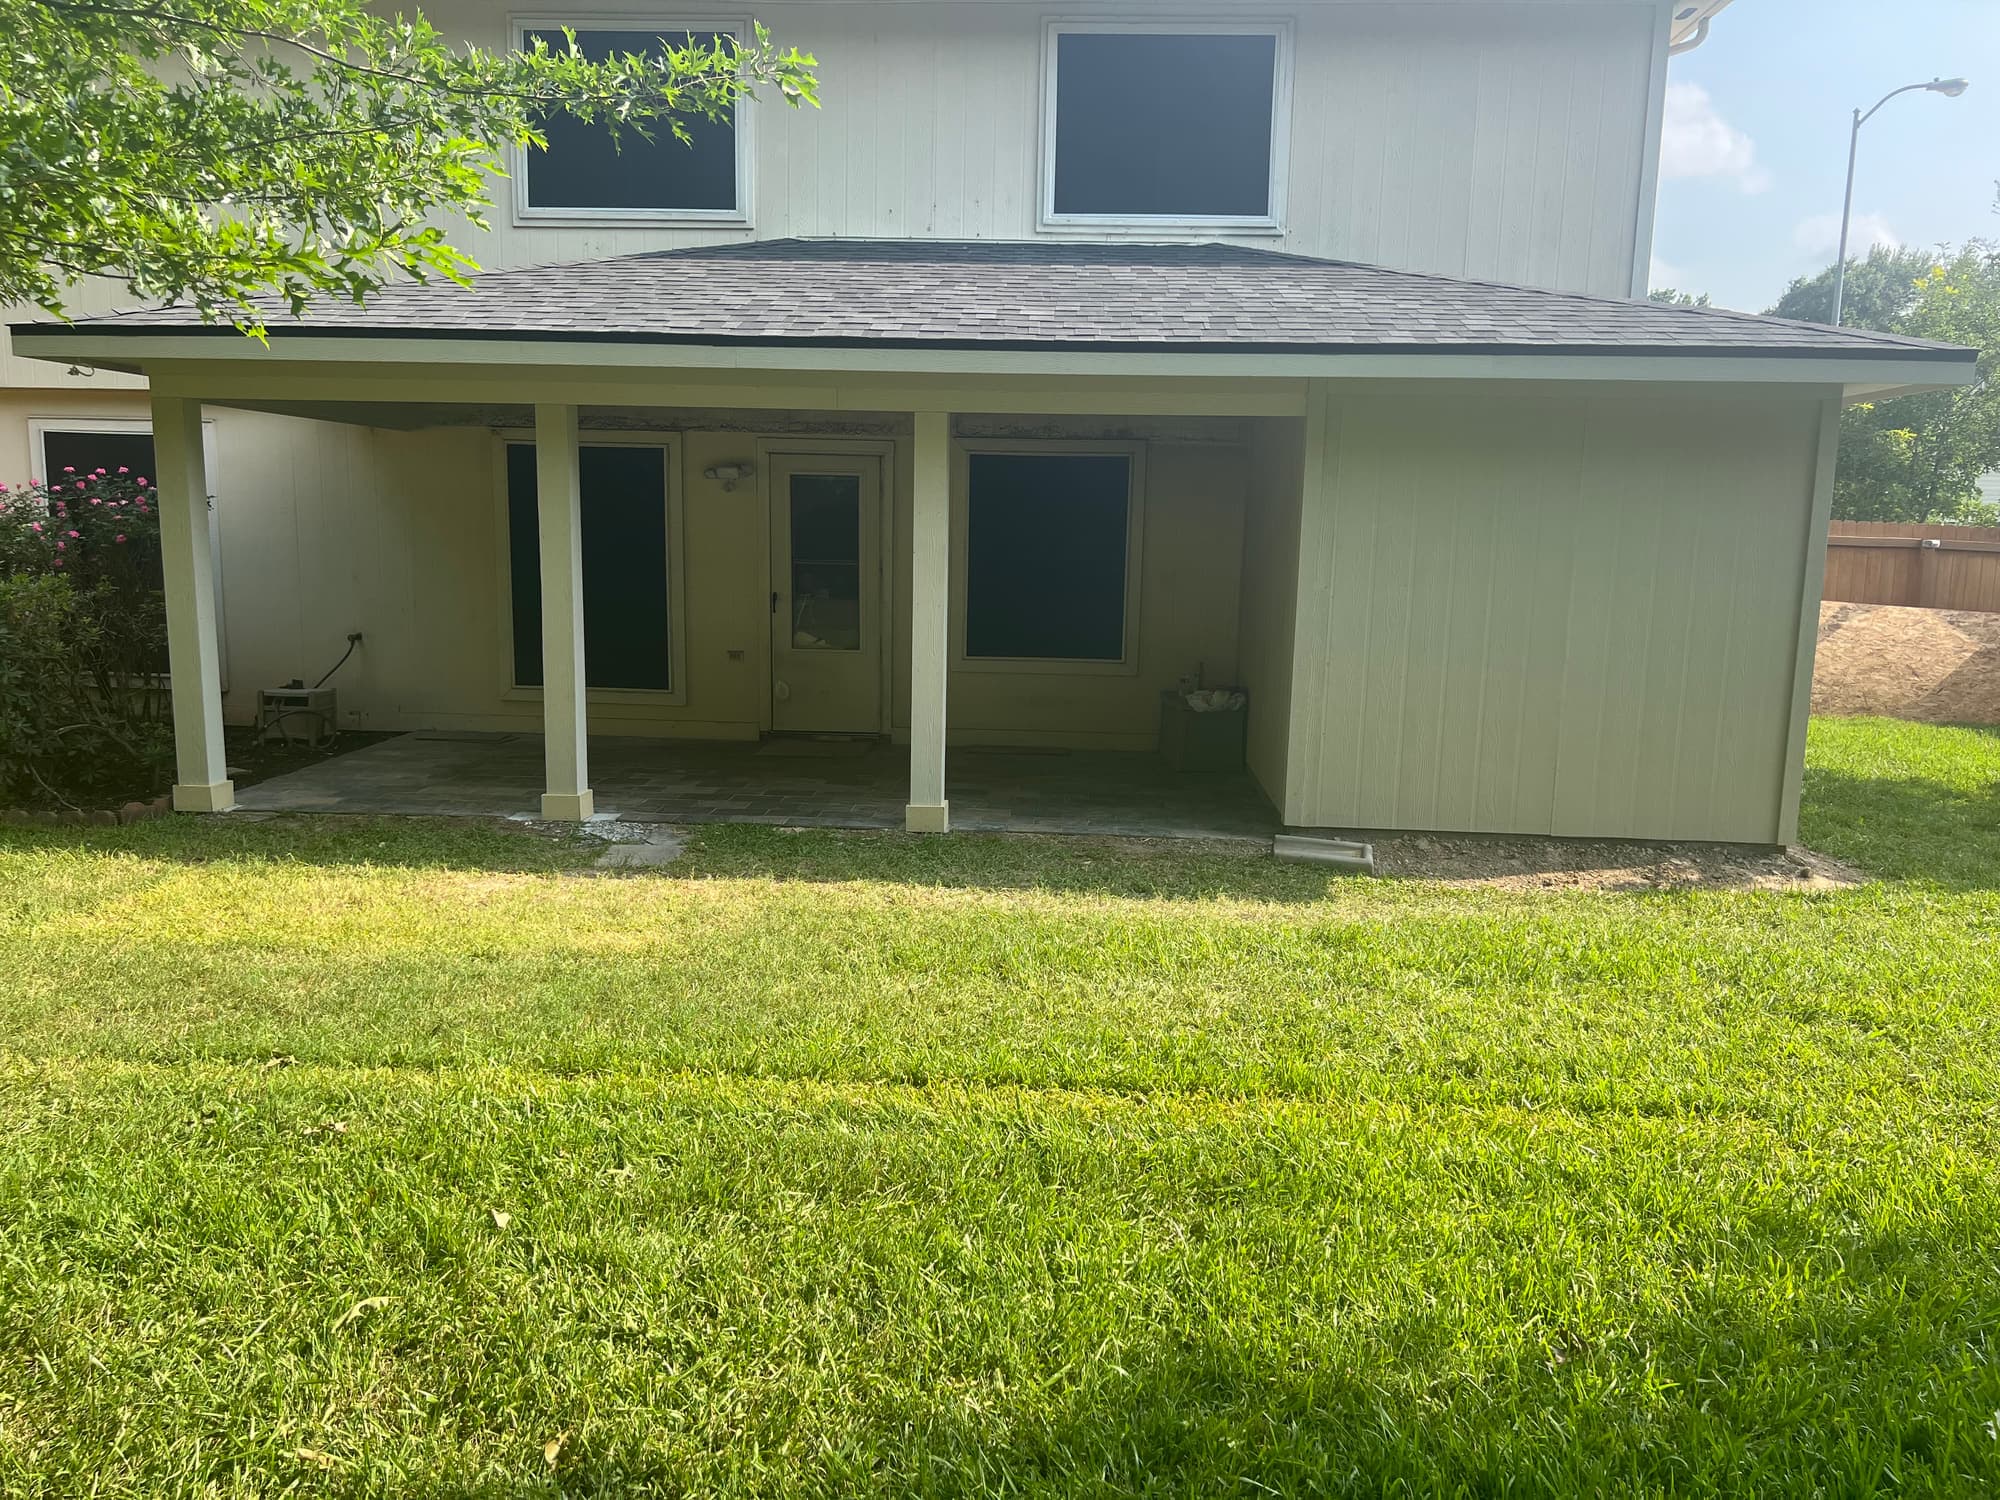
The finished cover: a framed hip roof shingled to match the existing roof, carried on painted posts.
What the job includes
Scope, in the order it happens
01
Removing the old awning or cover
The existing aluminium awning or patio cover comes off first, along with its fasteners. Anything those fasteners opened up in the brick, siding or fascia gets repaired before new framing goes near it, because a bolt hole left behind a new soffit is a leak nobody finds for two years. Old material is hauled off the site.
02
Footings and post bases
Piers are laid out, dug and poured, sized to the post loads and to what the local jurisdiction requires. Galvanized standoff bases or anchor bolts are set while the concrete is still wet and checked for square and elevation. The bases hold the end grain of the posts up off the concrete instead of letting them sit in standing water.
03
Posts, beam and wall connection
Treated or built-up posts carry a beam sized to the clear span you want between them, since fewer posts means a heavier beam. Where the cover attaches to the house, the ledger fastens into actual structure with the right anchors for the wall type. Brick veneer alone does not carry a roof.
04
Roof framing and uplift connections
Rafters go in at the spacing the span and slope call for, in a hip, gable or single-slope layout depending on how the existing roof line runs. Sheathing follows, with blocking where it is needed. Every rafter-to-beam and beam-to-post joint gets a rated metal connector, so uplift has a continuous path down to the footings rather than being resisted by nails in end grain.
05
Roofing, flashing and tie-in
Underlayment, drip edge at the eave and rake, and shingles matched as closely as the existing roof allows. The part that decides whether the job leaks is the flashing: step flashing woven into each shingle course along a side wall, apron flashing at a head wall, counterflashing into masonry, and a kick-out at the bottom of the run so water leaves the wall instead of running behind the siding.
06
Ceiling, fascia, trim and paint
The ceiling is exterior-rated material, not interior drywall, either an exposed rafter look or a finished soffit. Fascia, column wraps and exterior casing are installed and caulked, then everything gets exterior primer and paint. If you want a fan or lights, the blocking and box locations go in during framing, before anything is covered.
07
Patio surface: slab or pavers
Depending on the job this is a new reinforced concrete slab with control joints and an expansion joint against the house, or lifting and resetting an existing paver field around the new footings and re-sanding the joints. Either way the finished surface slopes away from the house, not toward it.
Materials and specification
What it is actually built from
Specifications vary with the house and what we find once it is open. This is the standard we work to unless there is a reason not to — and if there is, we will tell you what it is before we change it.
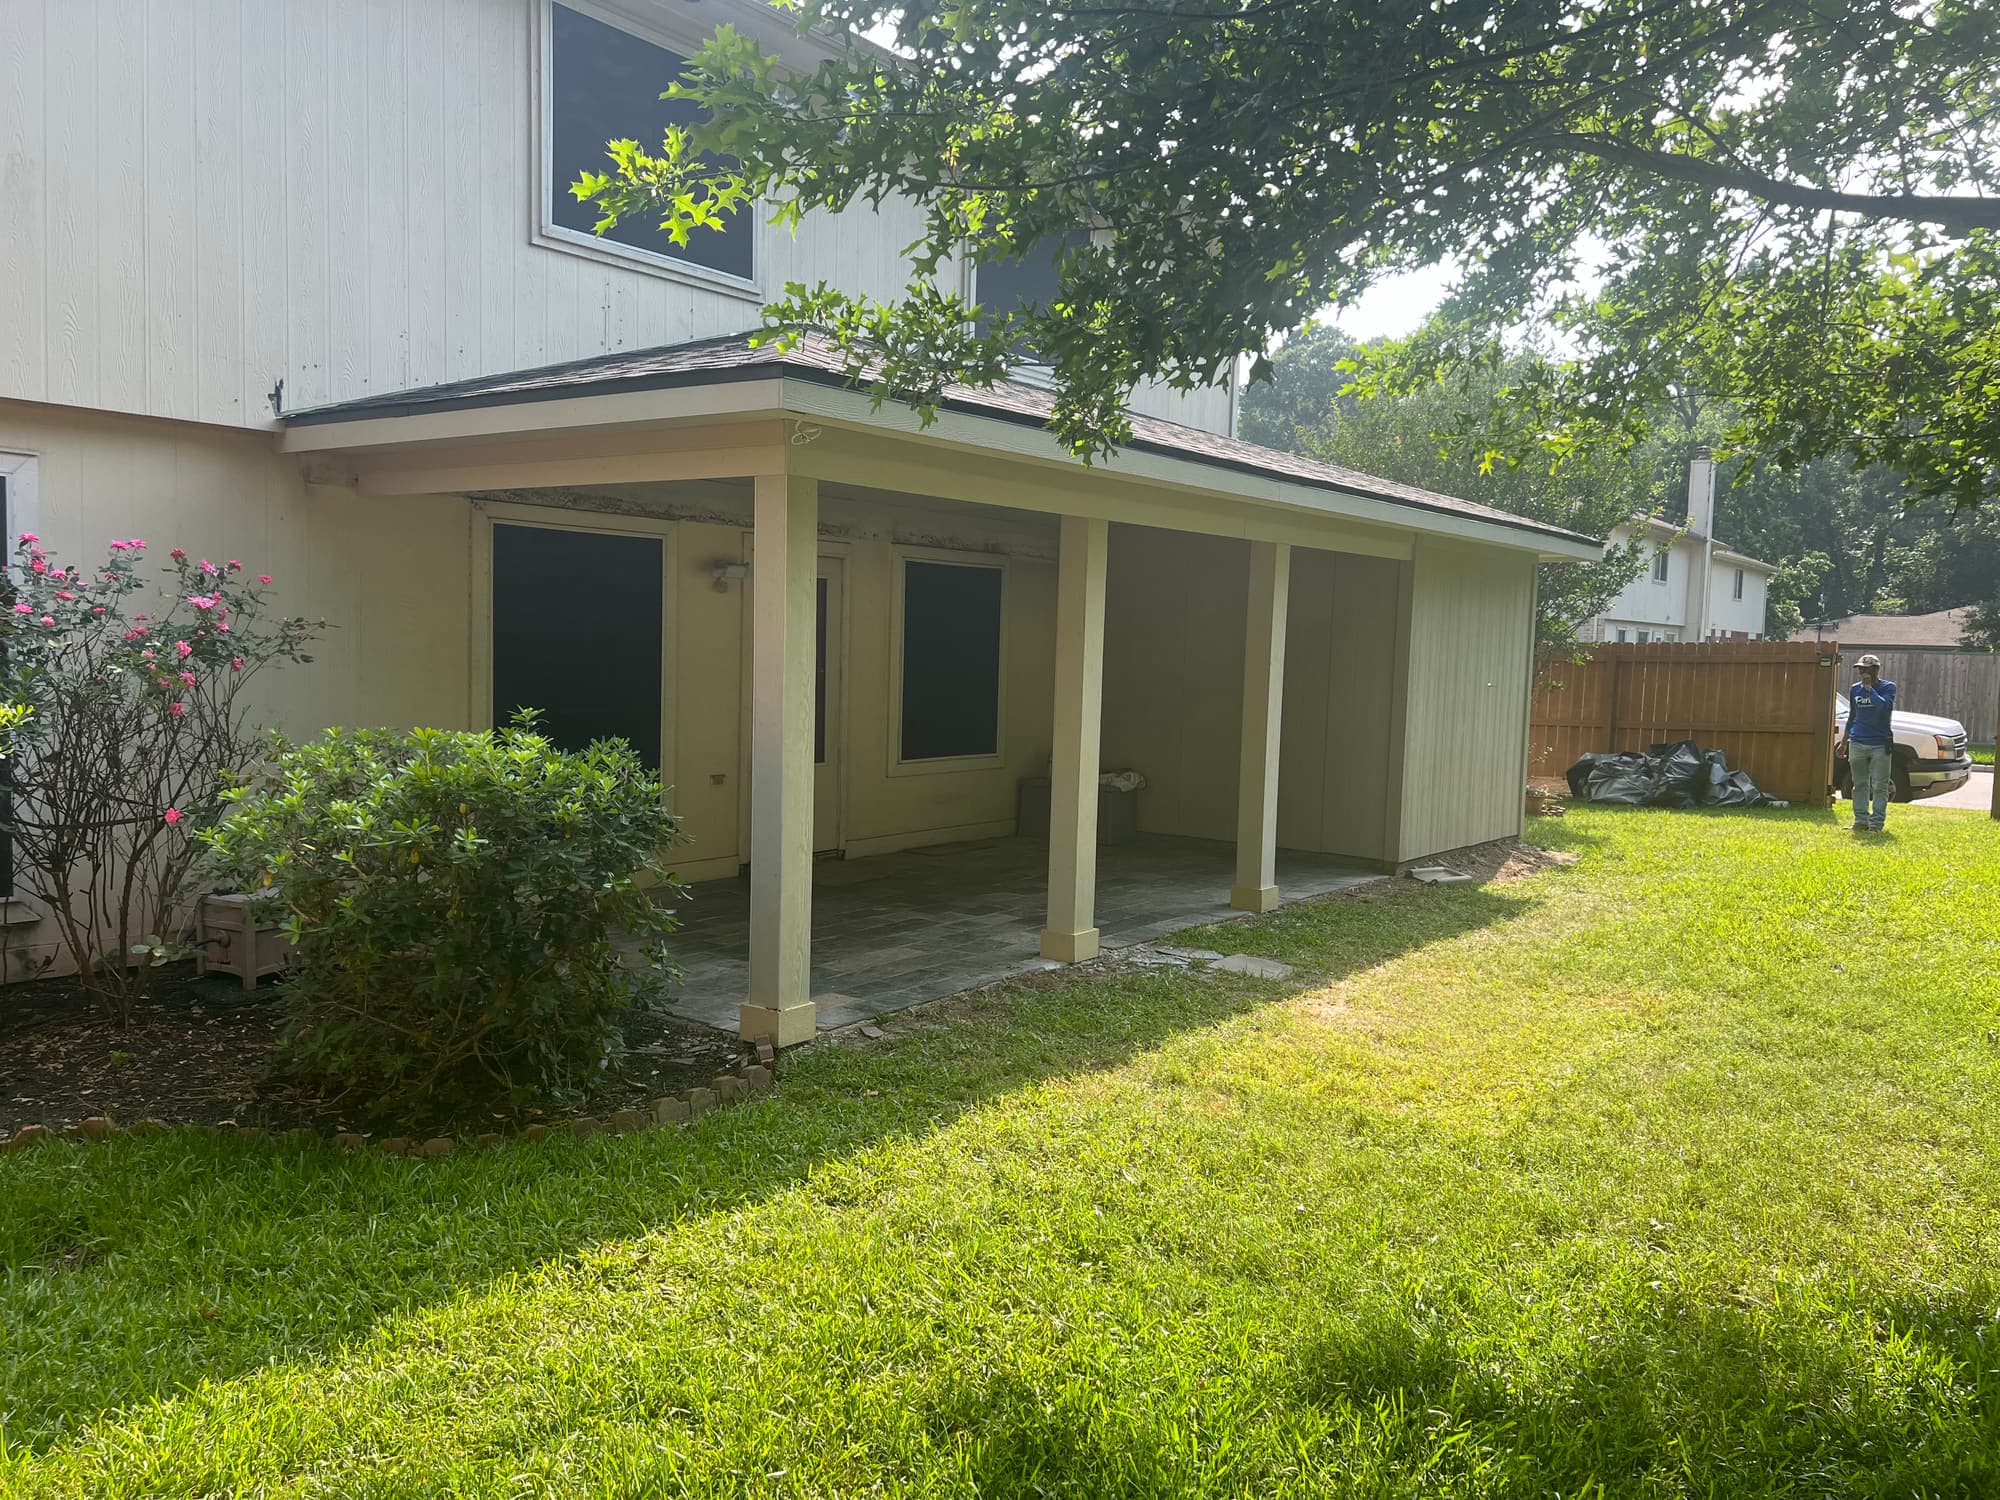
The enclosed west end blocks the afternoon sun; the roofline ties straight into the existing eave.
Footings
Poured concrete piers sized to post loads, soil conditions and the depth the local jurisdiction requires; in Houston clay the depth is driven by how deep the soil moves with the seasons, so it is set job by job rather than to a standard number
Posts
6x6 pressure-treated Southern Yellow Pine, or built-up 2x columns wrapped in trim, on hot-dip galvanized standoff bases that keep end grain about 1 in. above concrete
Beams and headers
Doubled or tripled 2x10 or 2x12 No. 2 Southern Yellow Pine with 1/2 in. spacer plies to match post width, or LVL where the clear span exceeds what dimensional lumber carries
Rafters
2x6 or 2x8 at 16 or 24 in. on center, spacing set by span, slope and roof load
Connectors and fasteners
G185 hot-dip galvanized post bases, beam caps and hurricane ties at every rafter; hardware rated for contact with treated lumber, and stainless in the most exposed locations
Sheathing and roofing
15/32 in. CDX plywood or 7/16 in. OSB with H-clips at unsupported edges, synthetic underlayment, self-adhered membrane in valleys and along the wall, metal drip edge, architectural laminate shingles matched to the existing roof
Flashing at the house
Step flashing at each shingle course on a side wall, apron flashing at a head wall, counterflashing let into masonry, kick-out flashing at the end of the run
Patio surface
New slab: 4 in. of 3,000 to 4,000 psi concrete over compacted base with #3 rebar at 18 in. o.c. on chairs, control joints cut the first day, expansion joint at the house. Pavers: 60 mm (2-3/8 in.) units over 4 to 6 in. compacted crushed base and 1 in. bedding sand, edge restraint on open sides
Local conditions
What changes because this is Houston
Gulf Coast clay, humidity and a storm season are not background detail. They decide how this work gets built.
Expansive clay moves, and the house and the patio do not move together
Greater Houston sits on the Gulf Coastal Plain over shrink-swell clay that swells in wet months and contracts in dry ones. A cover whose posts bear on shallow pads or on the existing patio surface rides that movement while the house sits on its own foundation, and the difference shows up first at the roof-to-wall joint, where flashing pulls open. Footings go below the seasonally active zone, and a new patio slab gets an expansion joint against the house slab rather than being poured tight to it.
Post-tension slabs cannot be drilled blind
Many Houston-area homes sit on post-tension slabs with tensioned cables running through them. You cannot core, saw-cut or drop anchors into that slab without locating the cables first, and hitting one is both dangerous and expensive to repair. On these houses we keep the load off the existing slab entirely by putting the posts on new piers, or we locate the cables before any anchor goes in.
Hurricane season means designing for uplift, not weight
From June through November the Gulf Coast sees tropical storm and hurricane exposure, and an open-sided patio roof is the worst case for wind: air gets underneath and pulls upward. Resisting that takes a continuous connected path from rafter to beam to post to footing using rated metal hardware, plus proper shingle nailing and a flashing detail that does not rely on sealant.
Humidity, rot and Formosan termites
Long humid summers and heavy rainfall keep exterior wood wet longer than it stays wet in a drier climate, and Formosan and native termites are an active problem across the region. Untreated wood touching concrete or soil is where the trouble starts, so posts stand off their footings, no framing bears directly on the slab, and the finished surface drains away from the foundation. Plated hardware rusts in this climate and bleeds stains down painted posts, so the galvanizing grade on connectors and fasteners is specified up front rather than left to whatever is on the shelf.
No zoning, but deed restrictions, easements and permits all still apply
Houston has no conventional zoning ordinance, so what usually governs a rear-yard structure is your deed restrictions and HOA covenants: rear and side setbacks, roof form and materials, and whether a cover may be enclosed. Separately, a roofed structure is normally permitted work, through the Houston Permitting Center inside city limits, Harris County in unincorporated areas, or or the city's own permit office in incorporated suburbs. Mailing address is not the same as jurisdiction, so an address that reads as one suburb can still be unincorporated county. Many suburban lots also carry a utility easement along the rear or side property line, shown on the recorded plat rather than in the deed restrictions, and a permanent roof structure generally cannot sit over it. This is worth checking on your survey before the post layout is fixed.
How it runs
From the first call to the last walkthrough
1
Site visit and measurements
We walk the back of the house and measure what actually controls the design: eave height, the existing roof pitch and where it can be tied into, the condition and slope of the current slab or pavers, and where water goes now. Site visits and estimates are free. This is also when we ask what the patio is for, because a dining table, a ceiling fan, a TV wall and a grill each change the plate height, the depth and the framing.
2
Layout, spans and drawings
Attached or freestanding, hip or gable or single-slope, post spacing and plate height get settled on paper before anything is ordered. Beam and rafter sizes follow from the spans you chose, not the other way around. The drawing is what a permit office and an HOA architectural committee both need to see.
3
Permits and HOA approval
We confirm which office covers your address and submit for permit there. HOA or deed-restriction review is a separate track with its own submittal, and it can require specific setbacks, roof materials or colors. We do not start framing until both are settled, because a structure built in the wrong place is a demolition bill.
4
Demolition, footings and cure
The old awning or cover comes down, the wall behind it is repaired, and the pier holes are dug, inspected where required, and poured with the post bases set. The concrete then cures before it takes any load. This step looks slow and it is not the place to save days.
5
Framing, dry-in and roofing
Posts, beam, rafters, connectors and sheathing go up, followed by underlayment, flashing at the wall and shingles. If the job is inspected, the framing and connector inspection happens while everything is still visible, before soffit or ceiling covers it.
6
Finish out and walkthrough
Ceiling and soffit, fascia, column wraps, caulk, exterior primer and two coats of paint, then pavers reset and the site cleaned. At the walkthrough we go over the patio with you on the ground and point out the flashing line, the connectors, where the roof sheds water, and what is worth checking after a major storm.
The enclosed west end blocks the afternoon sun; the roofline ties straight into the existing eave.
Rafters up and sheathing going on — the new patio cover taking shape in a single day.
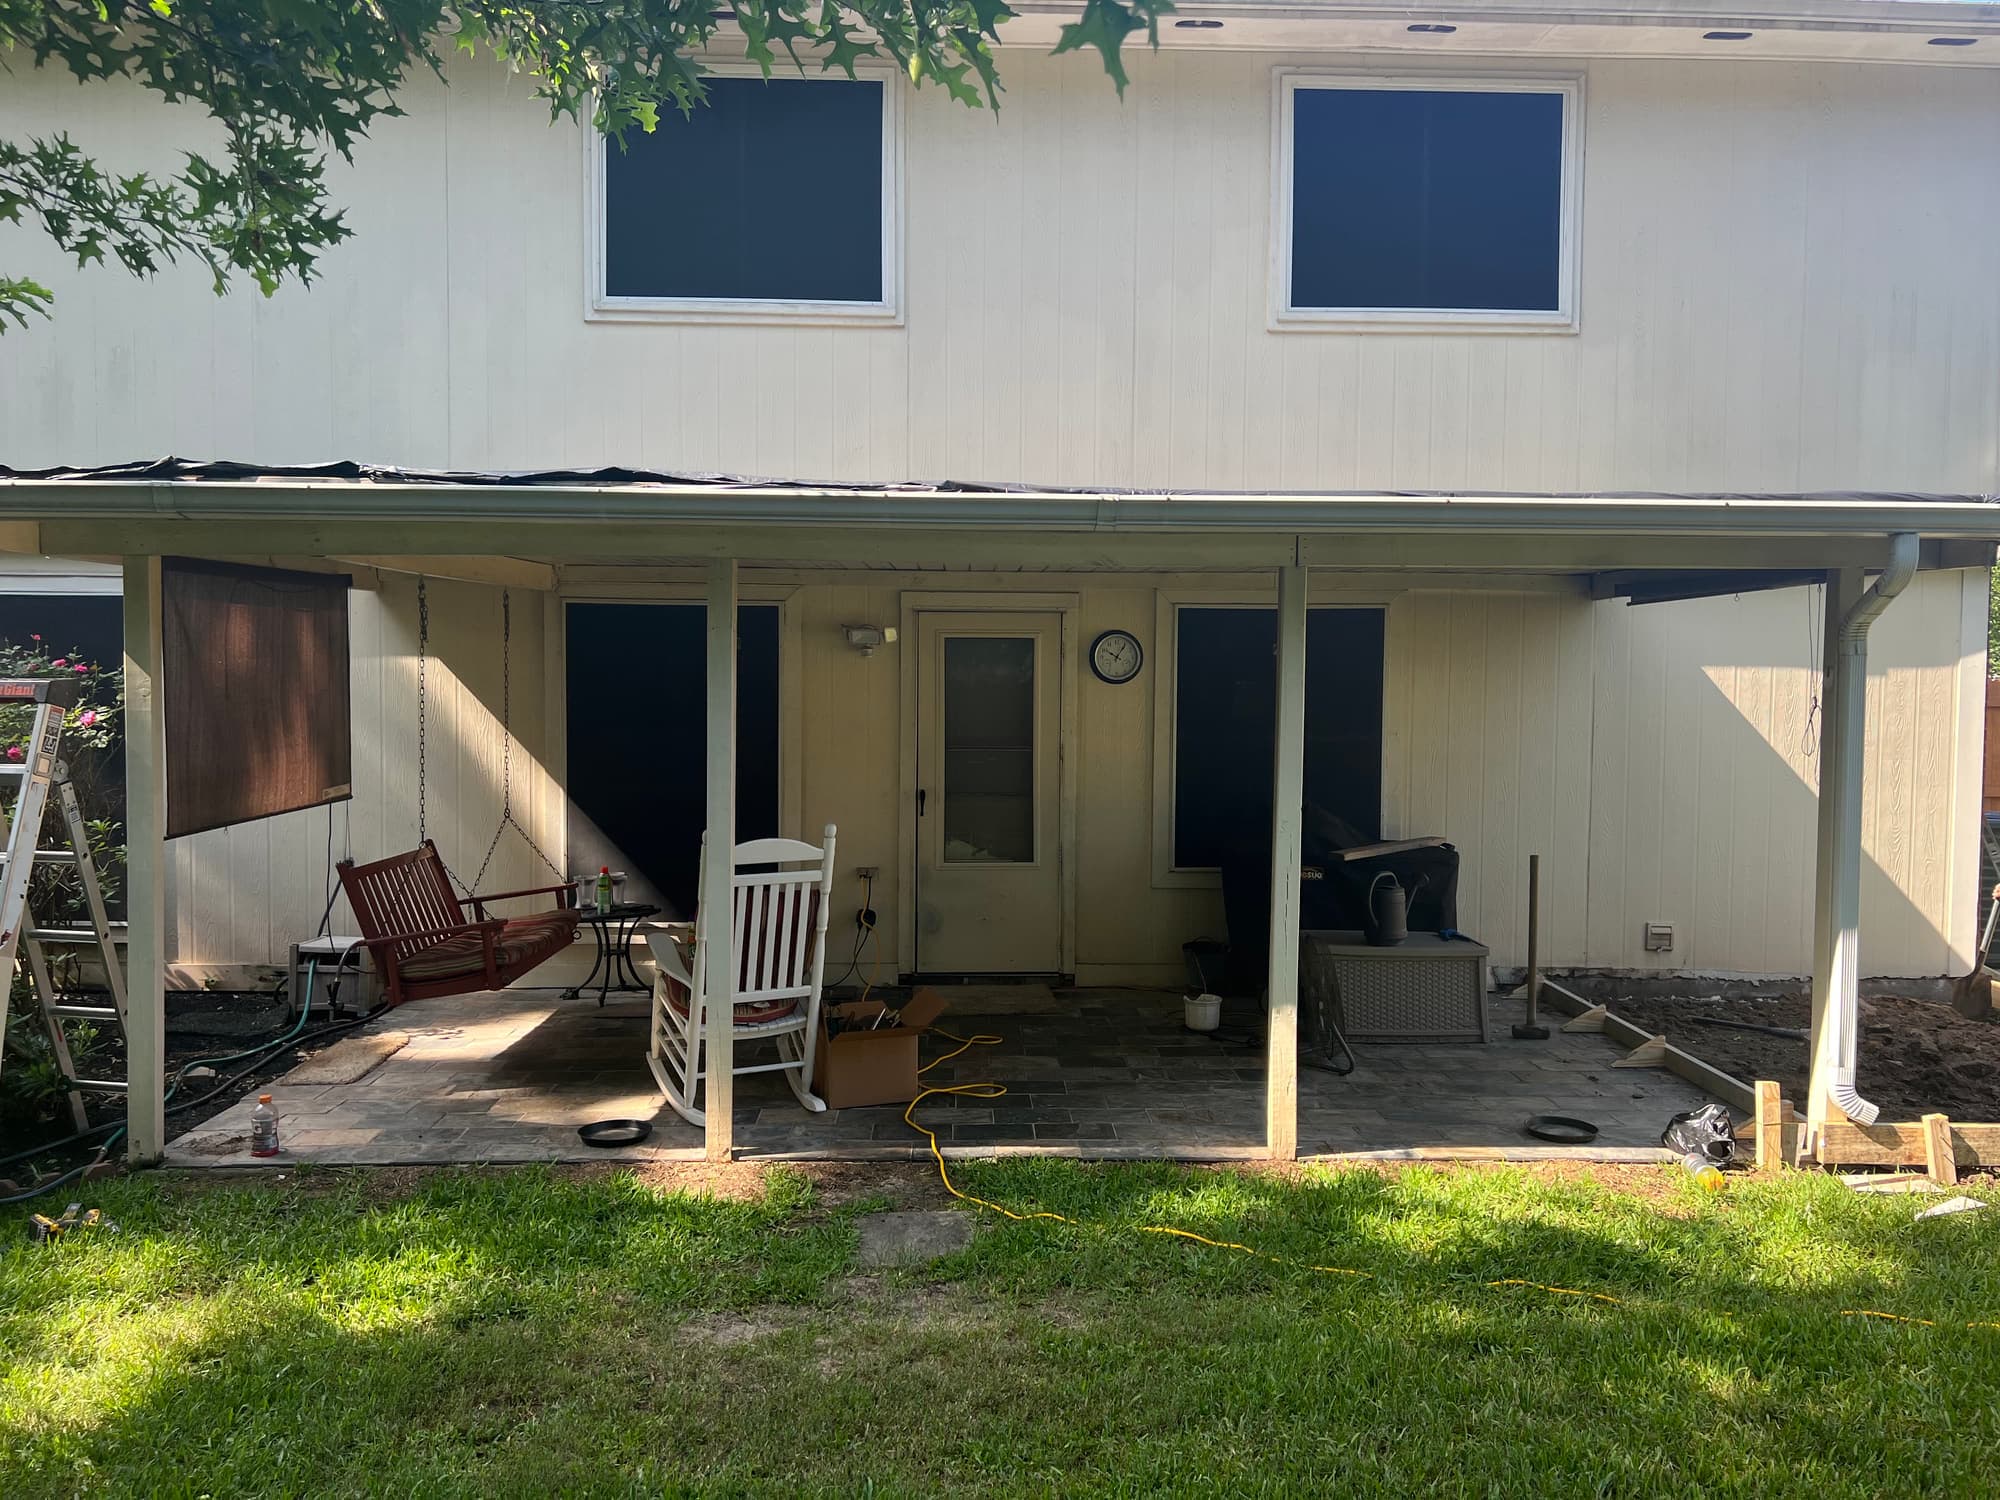
Before: a low aluminium awning over an existing paver patio, and not much shade.
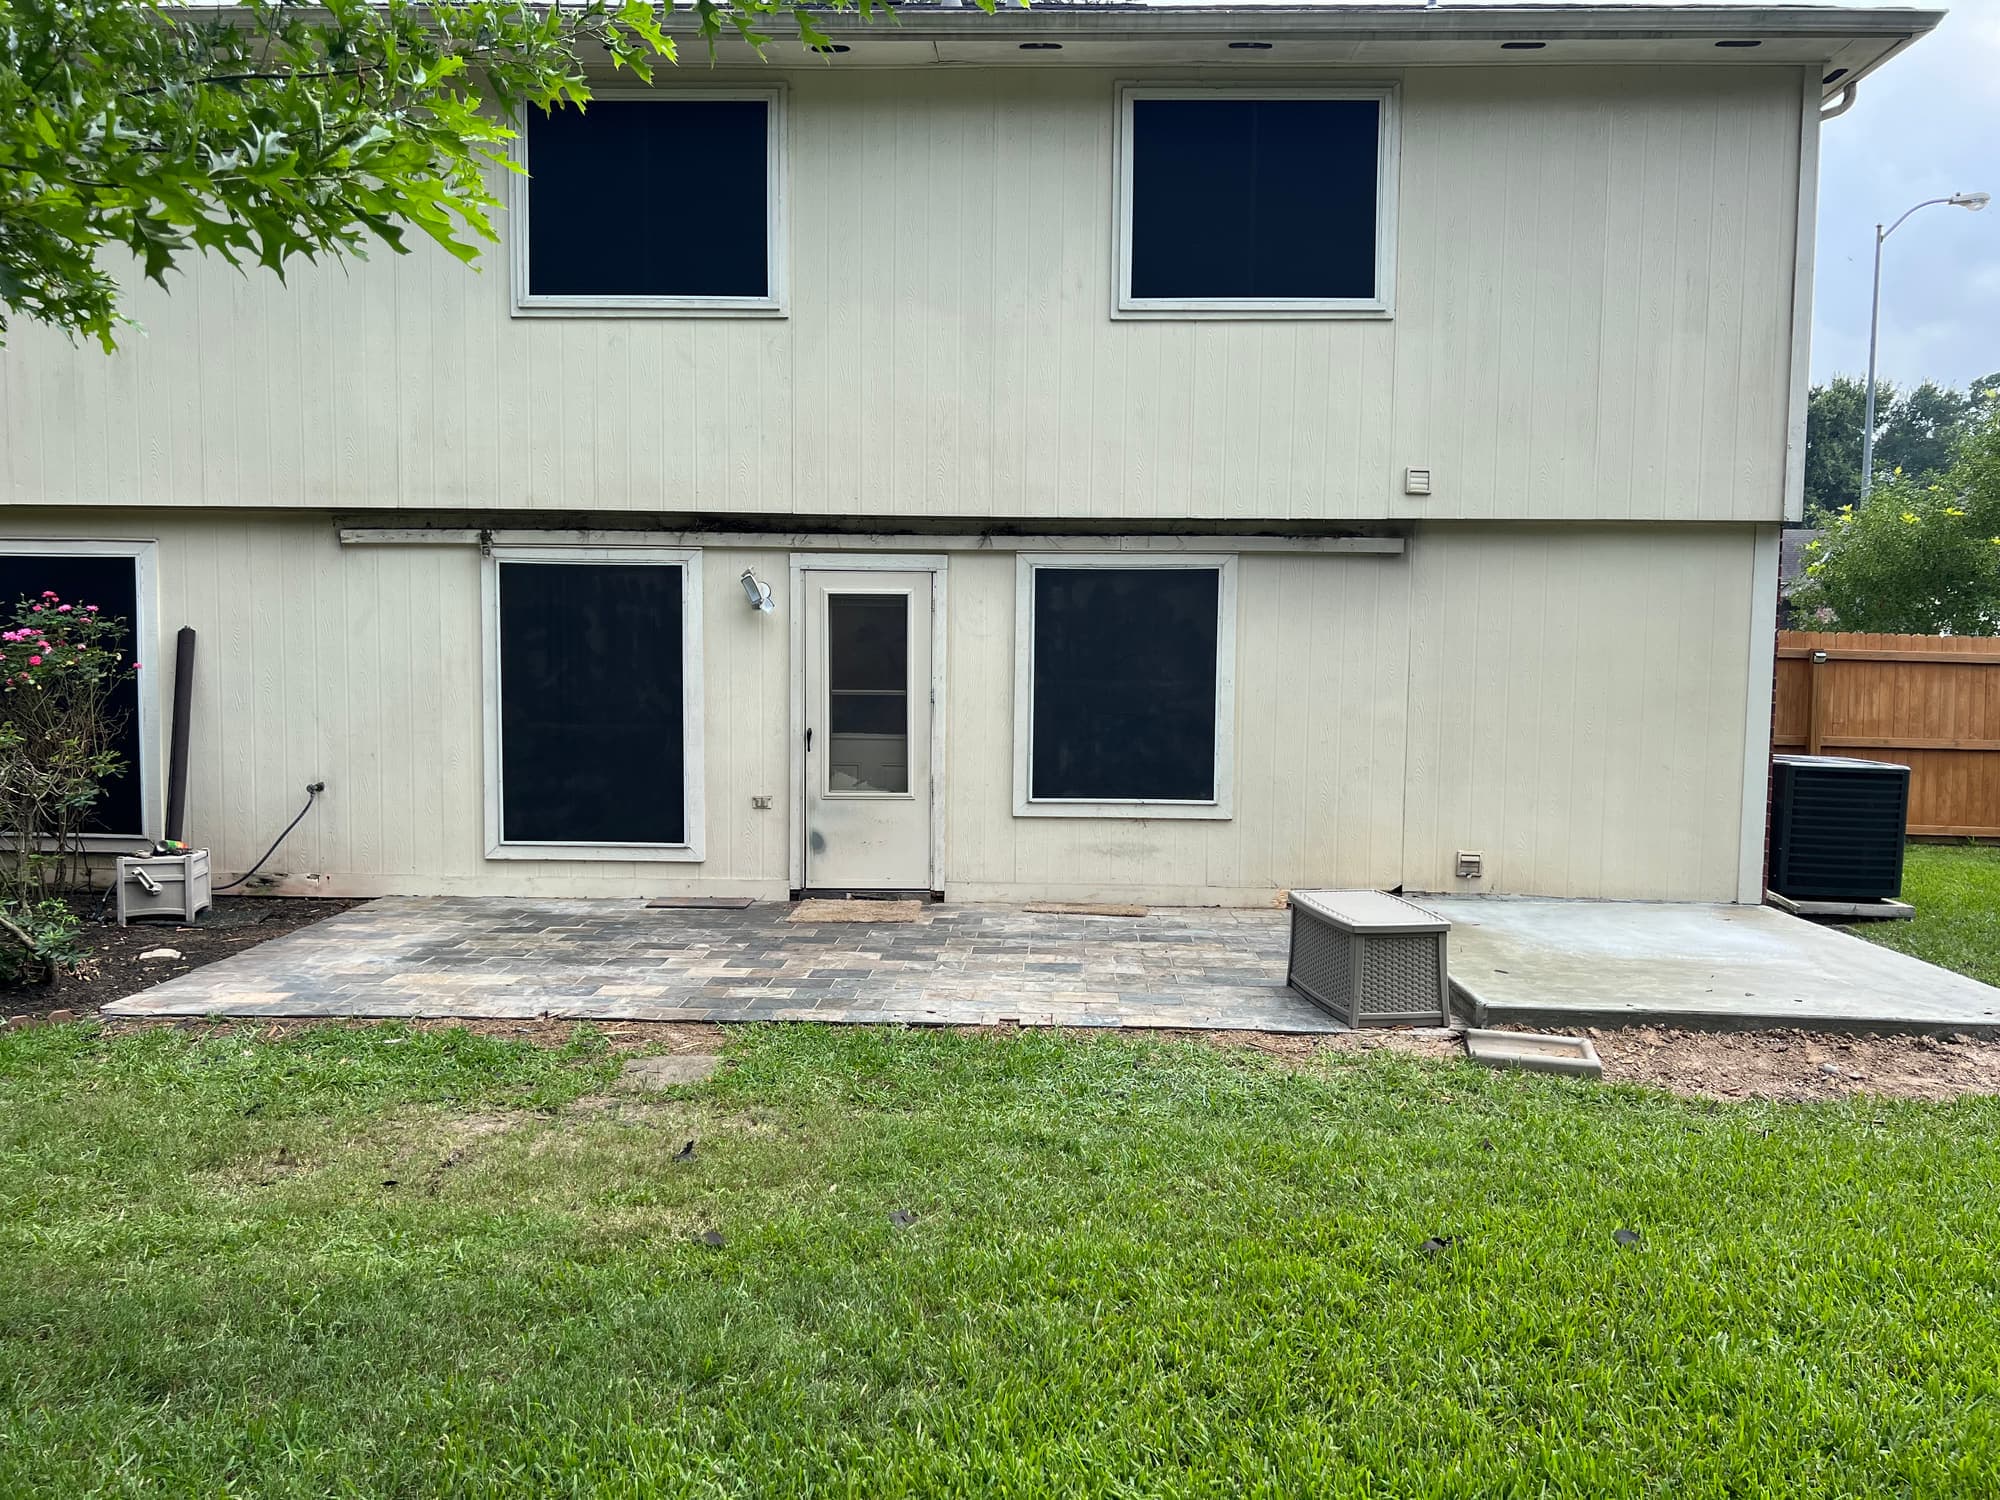
Awning stripped off, slab and pavers surveyed before the new structure was laid out.
Questions
Patios and Covered Patios, answered
Do I need a permit to build a covered patio in Houston?
A roofed structure attached to a house is normally permitted work, and where you apply depends on your address: the Houston Permitting Center inside city limits, Harris County for unincorporated areas, or the city's own office in incorporated suburbs. Requirements differ between those jurisdictions, so we confirm which one covers you before the design is finalized. A permit is also separate from deed restrictions and HOA architectural review, and it is common for both to apply to the same patio.
Should the cover attach to the house or stand on its own?
Attached is the usual choice because it gives a continuous roof line with no gap between two roofs to collect leaves and water, but it means opening into the existing roof or wall and flashing that joint correctly. Freestanding makes sense when the existing eave is too low to get comfortable headroom under a roof tied beneath it, when the wall is not something you want opened, or when the structure needs to sit out in the yard. The deciding factors are almost always eave height, existing roof pitch, and where the cover has to land.
Can I keep my existing patio slab or pavers?
Often yes. Often the existing surface stays. When a paver field is sound it can remain in place, with the new posts set on their own piers instead of bearing on the pavers. What disqualifies an existing surface is settlement, heaving from the clay underneath, or a slope that runs water back toward the house. Note that posts should never sit on a paver field or a thin slab, because that is a concentrated load neither surface was built to carry.
Will a covered patio make the rooms behind it darker?
Yes, and it is the most common regret when nobody brings it up beforehand. A solid roof over a back wall full of glass cuts the direct light reaching the adjacent rooms, and the effect is worst with a low plate height and a dark-painted ceiling. It can be managed with a taller plate, an open gable end, a light-colored ceiling, or a section of translucent panel, but those are framing decisions, so they need to be made before the rafters go up rather than after.
How does a patio cover hold up in Gulf Coast wind?
The structural risk on an open-sided roof is uplift rather than weight, because wind gets underneath and pulls the roof up. That is why each rafter is tied to the beam with rated metal hardware, the beam is capped or strapped to the posts, and the posts are anchored to concrete piers, so uplift is carried into the concrete by hardware instead of by nails in end grain. No one can promise a specific outcome in a specific storm, but a fully connected framed roof behaves very differently from an awning fastened to a fascia board.
Can I have a ceiling fan, lights and outlets under it?
Yes, and the decisions belong in the framing stage, because blocking and box locations have to go in before sheathing and ceiling material. Fixtures and boxes under a patio roof need to be rated for damp or wet locations depending on how exposed they are, and exterior receptacles are GFCI-protected. We frame and block for the layout you want, then coordinate the connections with an electrician.
Call and talk to someone who has been doing this for 15+ years. We will look at the space, tell you what the work actually involves, and put a number on it — at no cost.